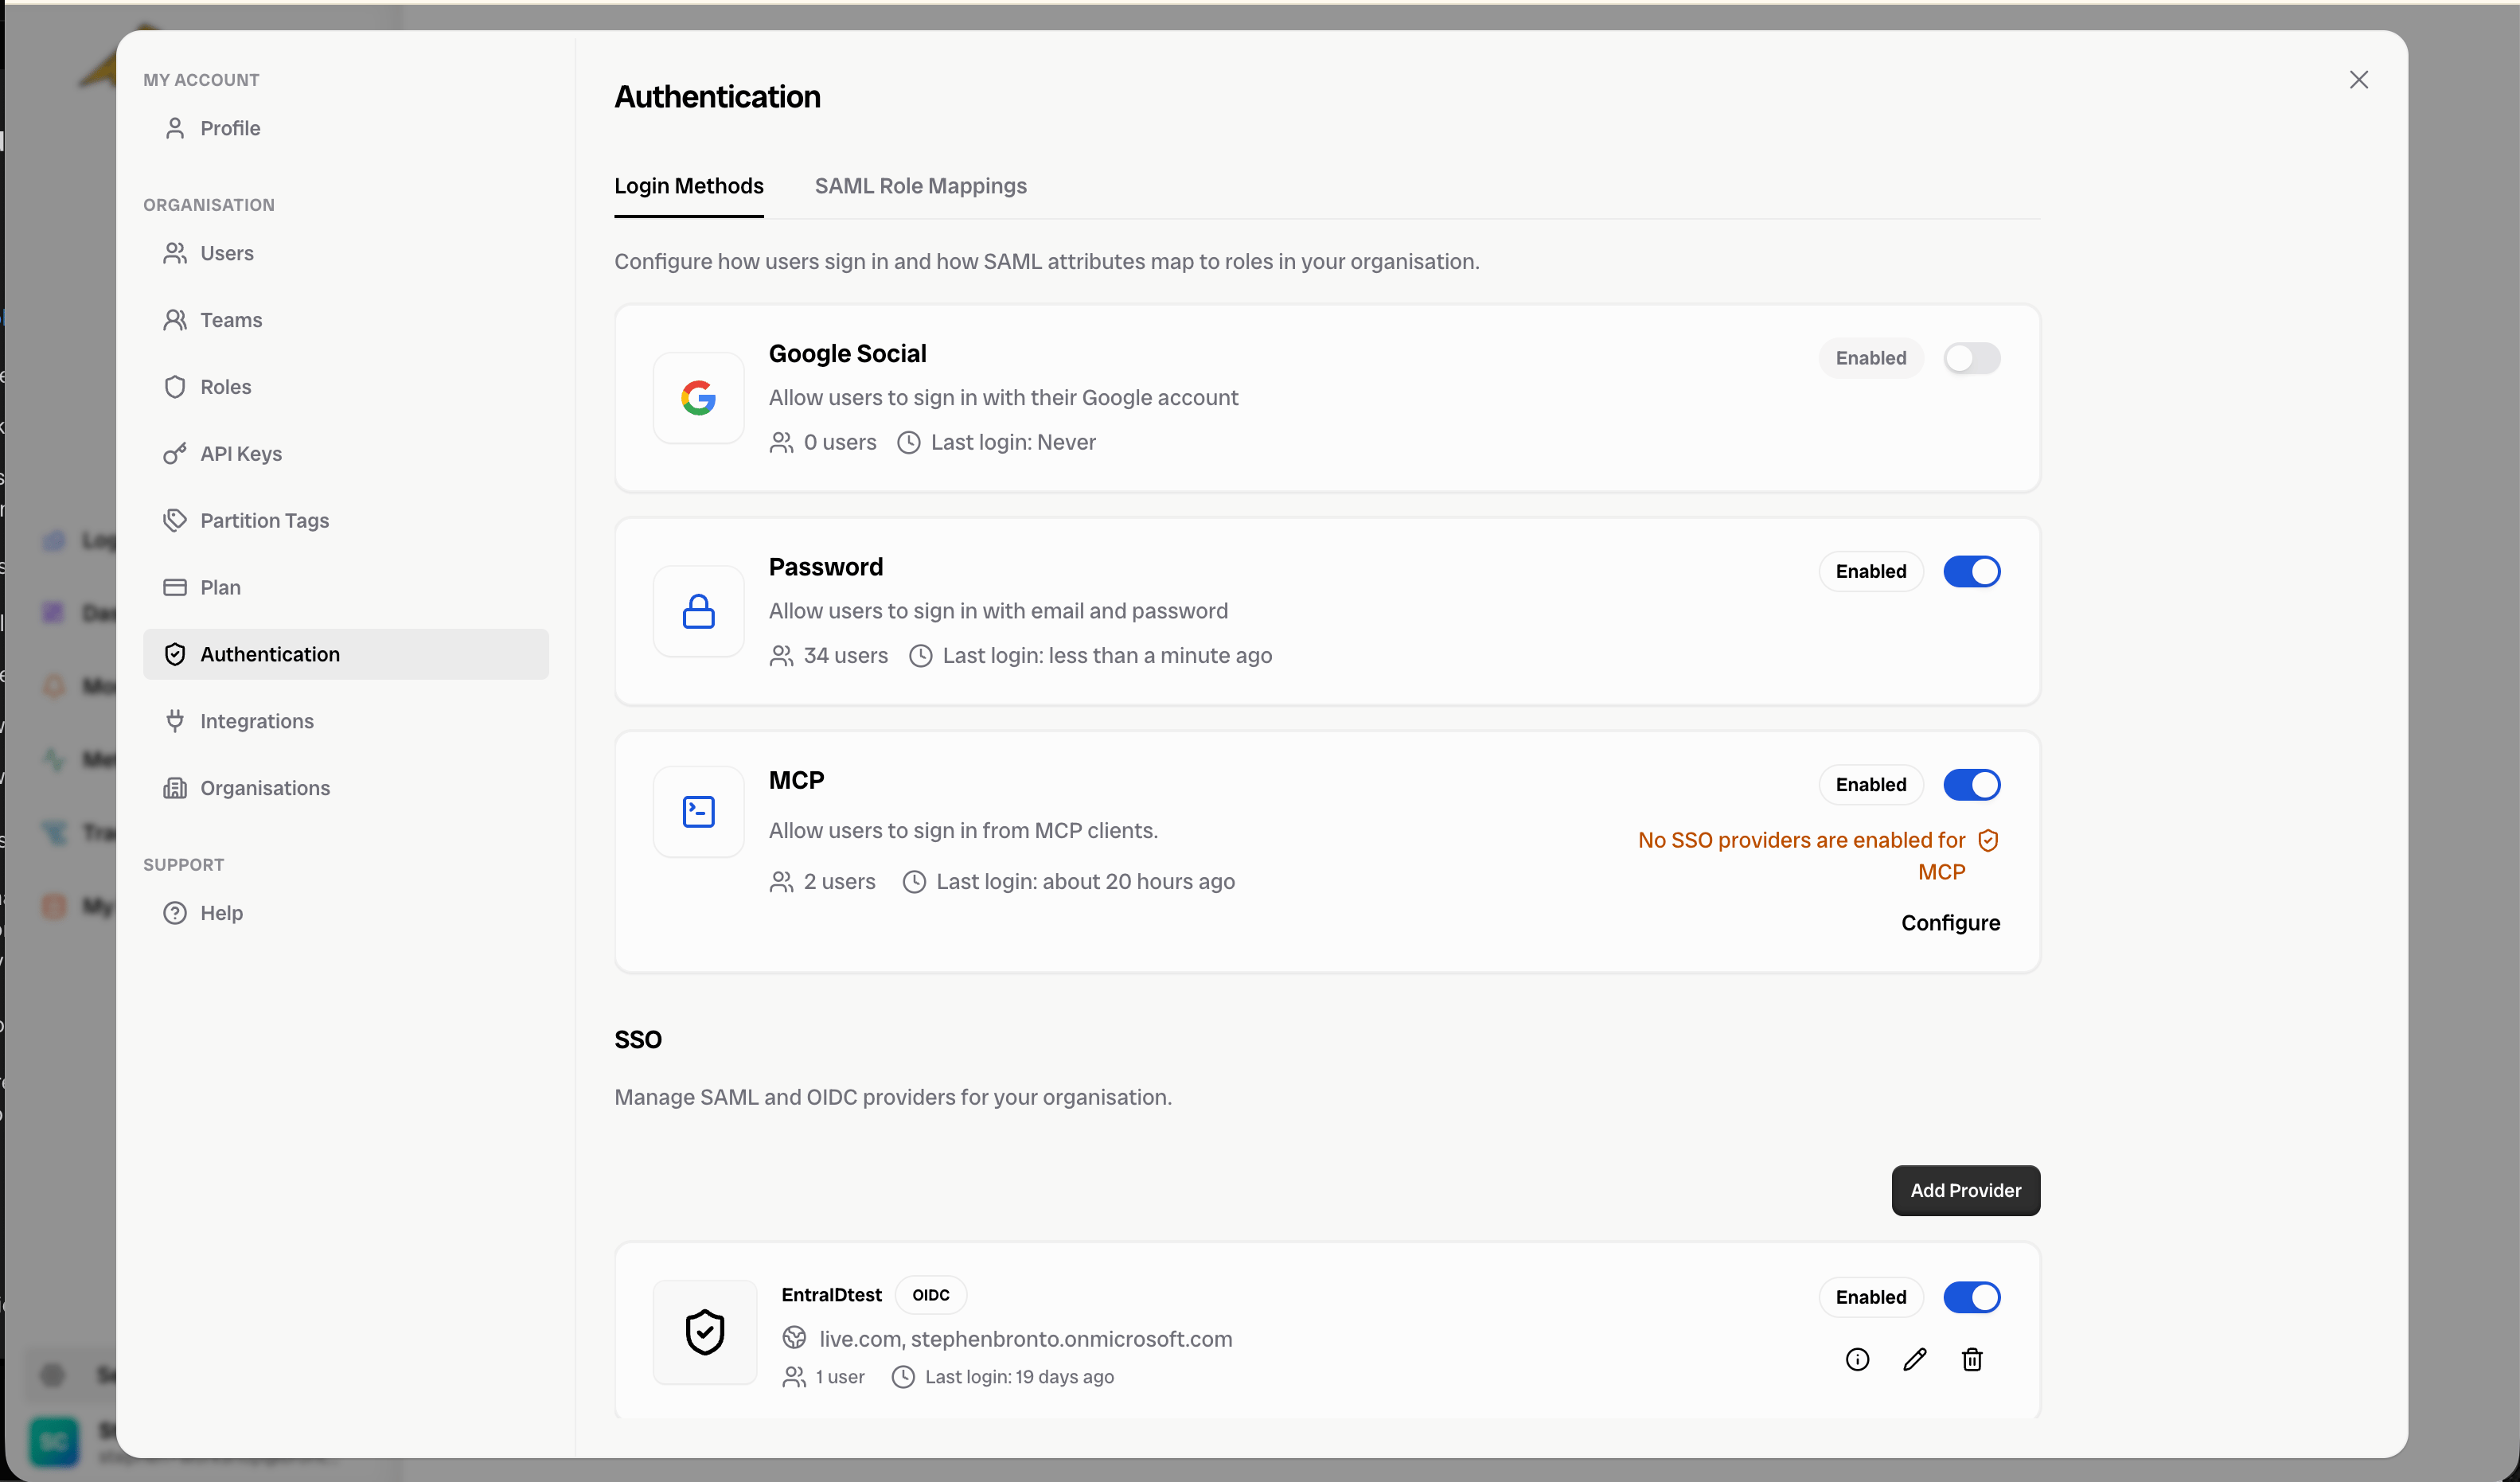
Overview
Single sign-on (SSO) lets your users log in to Bronto through your existing identity provider (IdP) instead of a Bronto password. Bronto supports both SAML and OIDC providers. For step-by-step instructions for a specific provider, see:- Google SAML IdP
- Okta OIDC
- Microsoft Entra ID (SAML or OIDC)
Add an identity provider
- In Bronto, go to Settings > Authentication > Login Methods.
- In the SSO section, click Add Provider to launch the setup wizard.
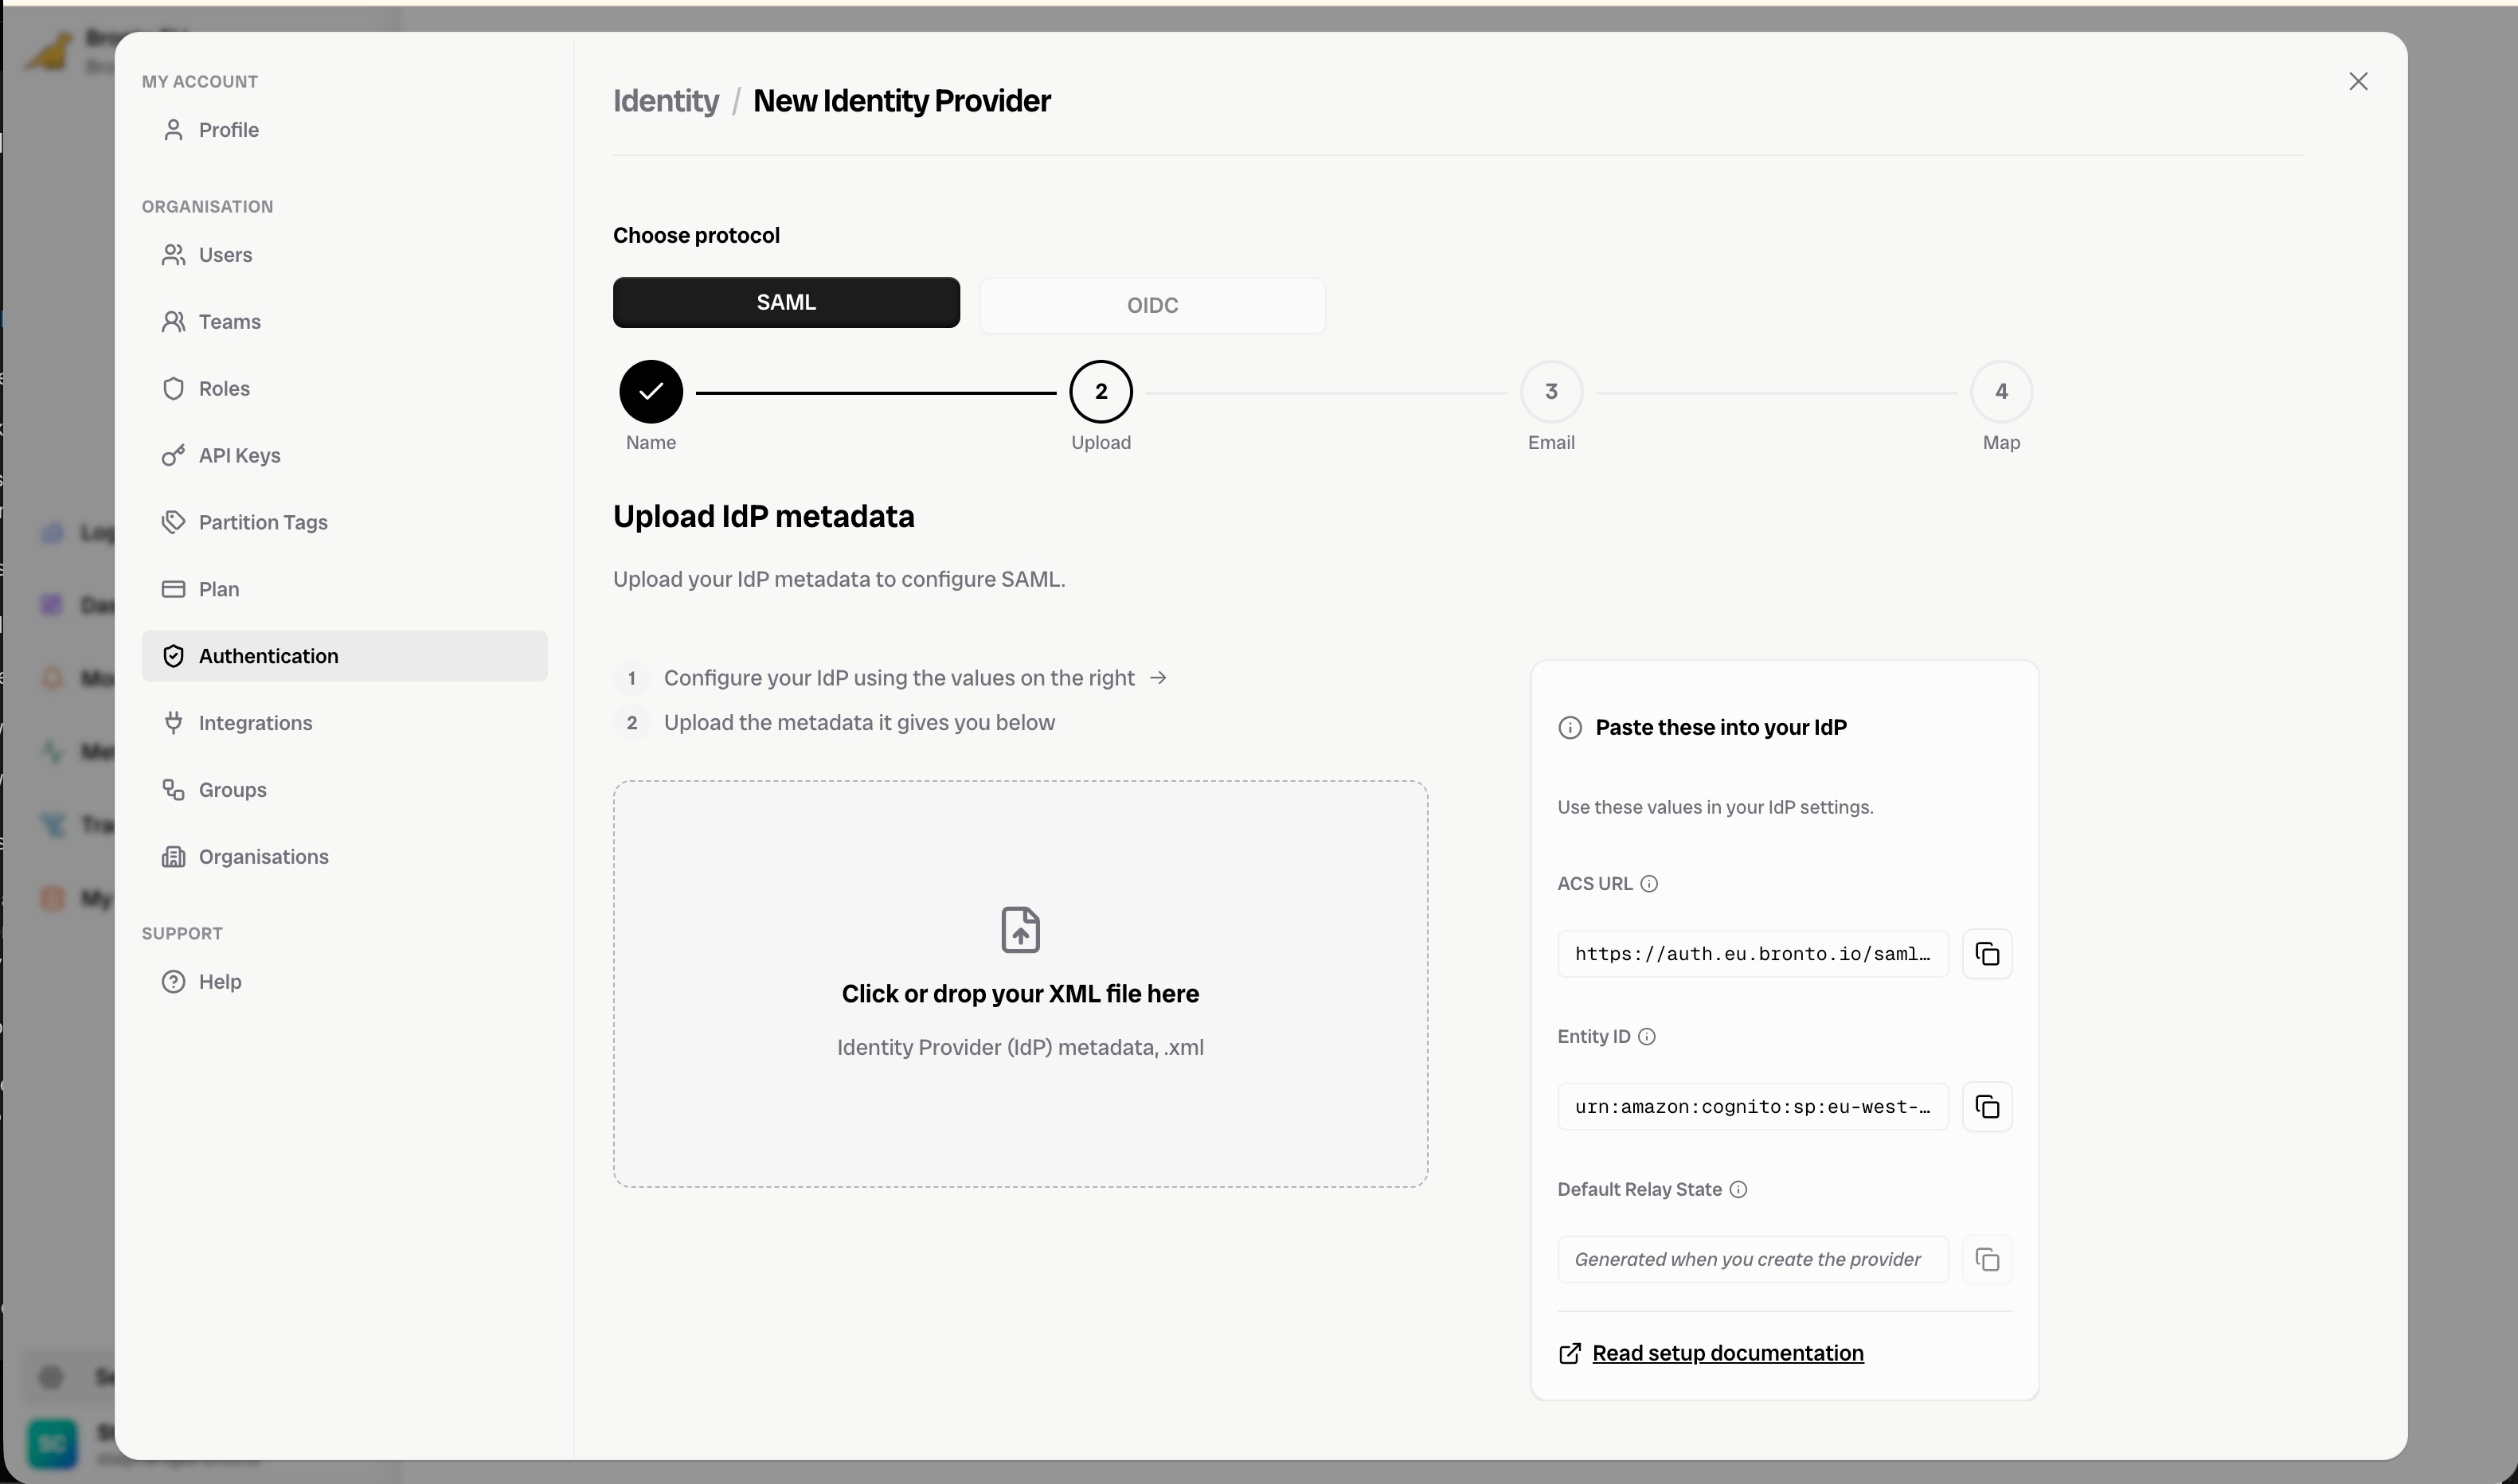
Name
Pick a unique name for this IdP within your organisation.Upload (SAML) / Provide (OIDC)
Provide the connection details for your chosen provider:- SAML — Upload the IdP metadata XML from your provider.
- OIDC — Enter the Client ID, Client Secret, and Issuer URL from your provider.
Each domain may only be associated with a single IdP — ensure they do not repeat across providers.
Map
Map your IdP’s attributes to Bronto’s. The attributes required by Bronto are First Name, Last Name, and Email. Input the matching provider attribute name, as configured in your IdP, in each row (e.g.given_name → First Name).
If you wish to use role mapping, also add a mapping to the custom:member_of attribute — click + Add role mapping if a row for it isn’t already shown.
Click Save to create and enable the IdP.
Manage providers
Your new IdP is enabled automatically and appears in the SSO list on the Login Methods page, where you can enable or disable it, view its details, edit it, or delete it. You control which login methods are enabled from the same page — you must always have at least one login method enabled.To view a provider’s connection details again (ACS URL, Entity ID, Start URL, etc.), open the provider from the SSO list.